
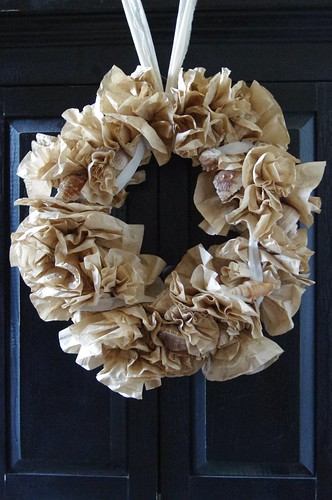
I’d been looking for a new wreath for our place. After looking around a bit at blogs for ideas, I found that some people had been using interesting materials to them. I decided to try my hand at making one out of …. coffee filters! There’s no sewing, and it’s super easy to do! I’m loving how this looks 🙂
Here’s how you can make a coffee filter wreath of your own. You’ll want to gather:
– a foam wreath from a craft store
– 50 or so coffee filters, I used the non-bleached kind.
– some muslin or fabric
– corsage pins, at least 2 inches long
– shells
– velvet ribbon
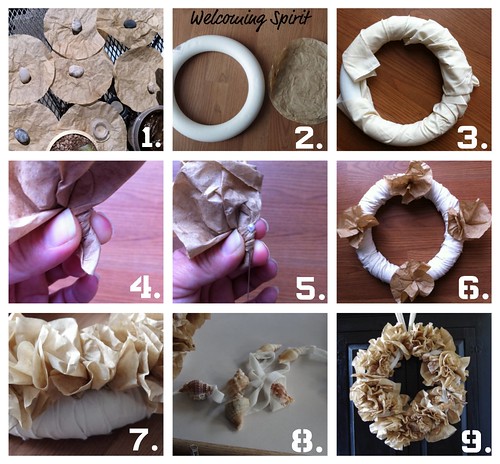
1. I took about 50 filters and placed them in a tupperware bowl with old coffee grounds. If you’re like me and enjoy a cup of coffee every morning, especially the one made out of freshly ground coffee provided by the likes of Iron and Fire or similar companies, you’d have a pretty big collection of filters as well. The idea is that it gives them some differentiation in colors and ads interest. After they’d all sat for an hour or so, I took them out and dried them in the sun.
2. A white foam wreath as the base for the project. I picked this up at Jo-ann’s for about $5. Here it is with the filters.
3. I used scrap muslin I found at the craft store for $1.75 to cover the foam. Rip the muslin into 3 inch strips to give it a rustic look. It took four long strips to cover the wreath. I pinned the muslin on with corsage pins.
4. With the filters now dried, I began forming rosettes with each one. You can do this by grabbing the center,and twisting the filter.
5. Once you have the rosette formed, place a corsage pin through the little tail that is formed. The pin holds the flower’s shape. And you can use the pin to place the rosette on the wreath. Bonus!
6. With all of the rosettes done, start pinning the flowers on the wreath. To spread the rosettes out evenly so the coverage was about the same all over the wreath.
7. Work from the center so you get even coverage.
8. I then took some shells glue gunned on to a velvet ribbon and used them to add more decoration to the wreath. The velvet ribbon gets pinned to the wreath to hold the shells in place.
9. Tie another piece of muslin around the top of the wreath and hang!
Shared on: Somewhat Simple